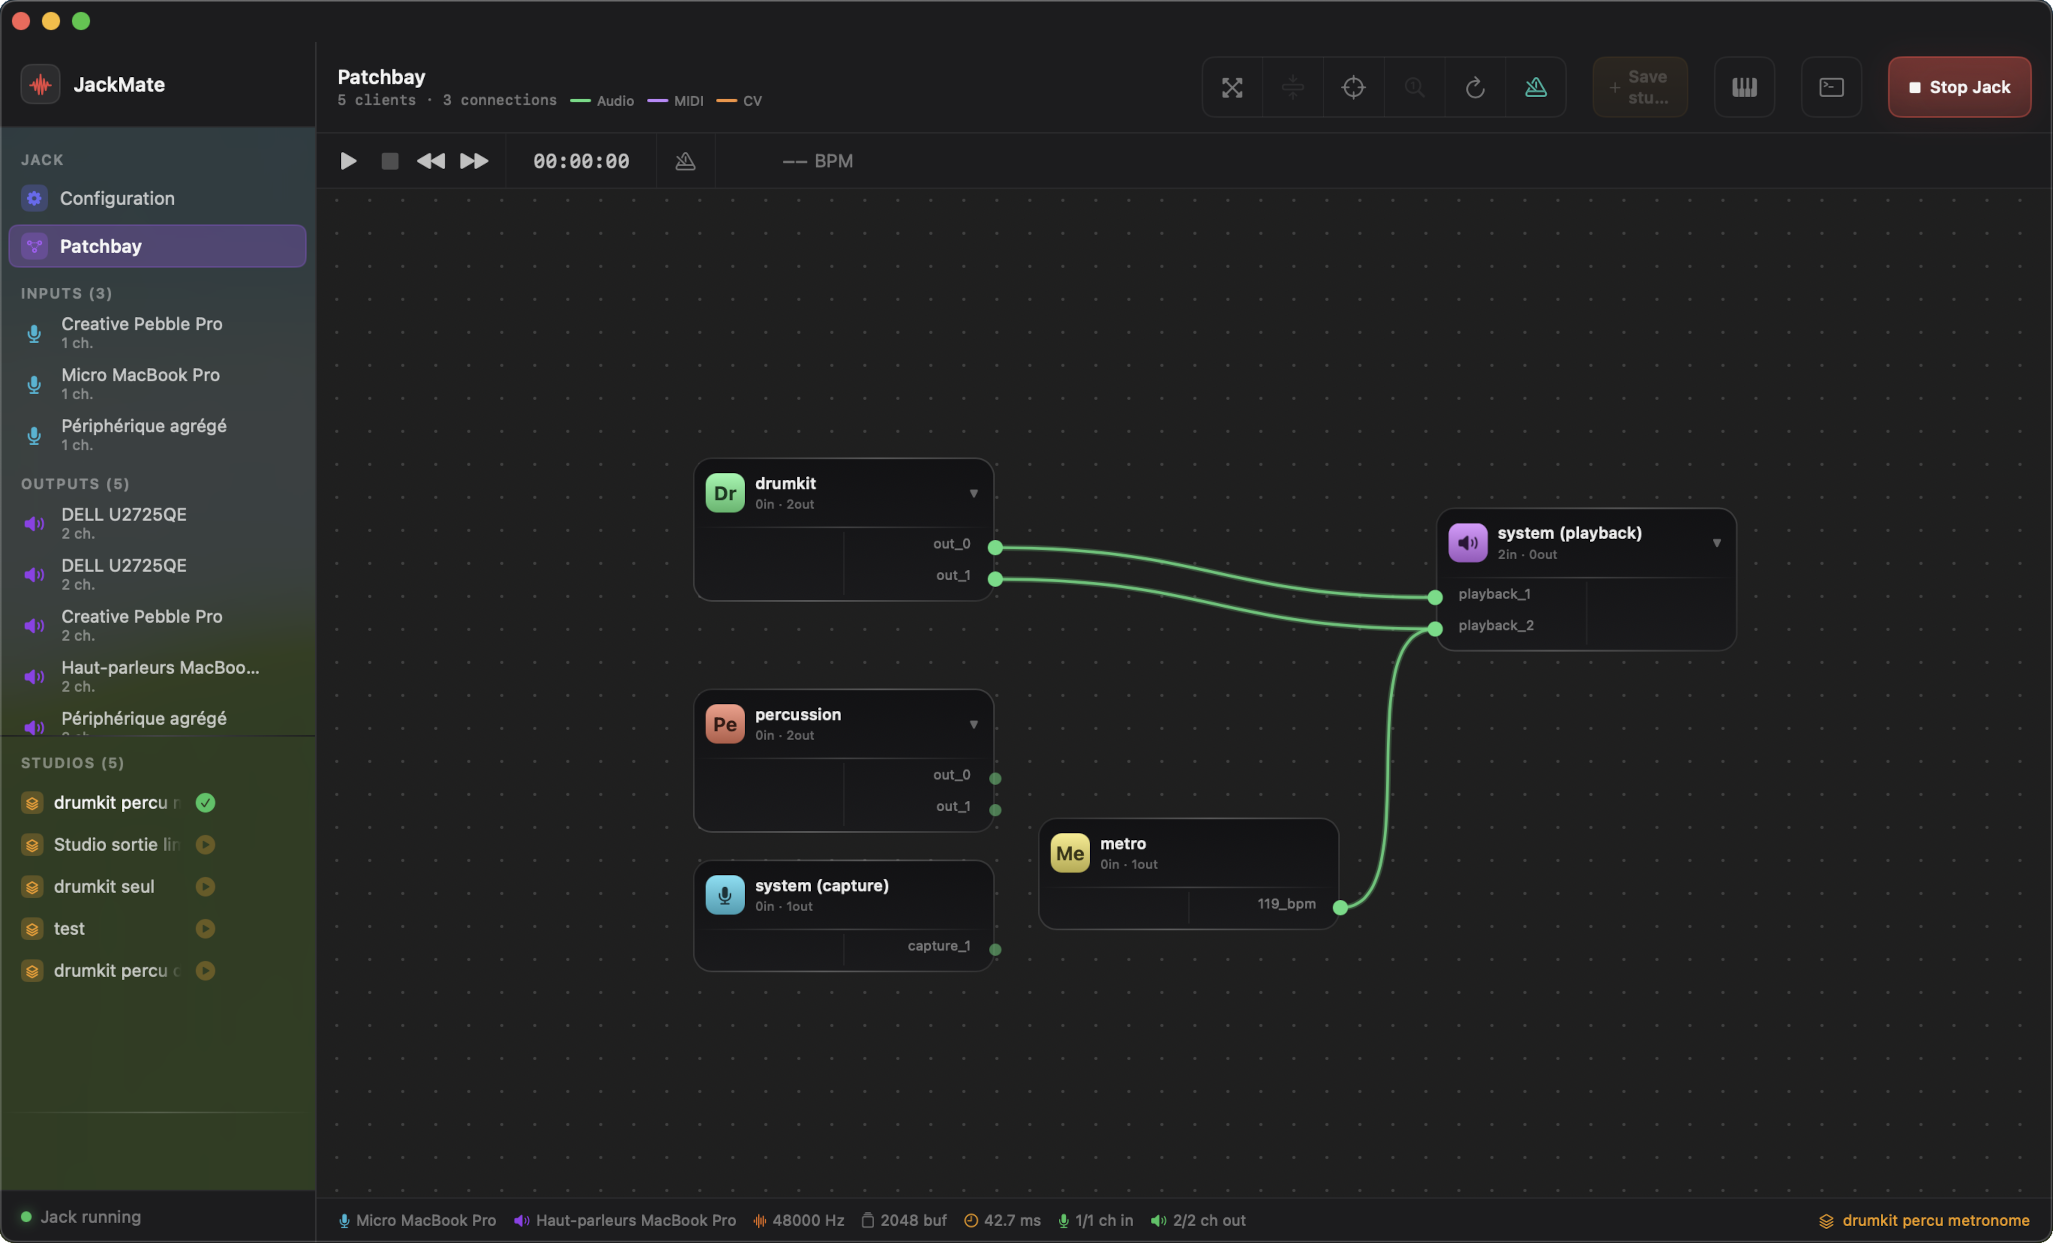
Patchbay
The Patchbay view shows the live state of the Jack Audio universe: all connected clients, their ports, and the connections between them.
The Patchbay is only available while Jack is running.
Concepts
Clients and ports
In Jack, each audio application is a client. Each client exposes ports:
- Output ports — on the left side of the node
- Input ports — on the right side of the node
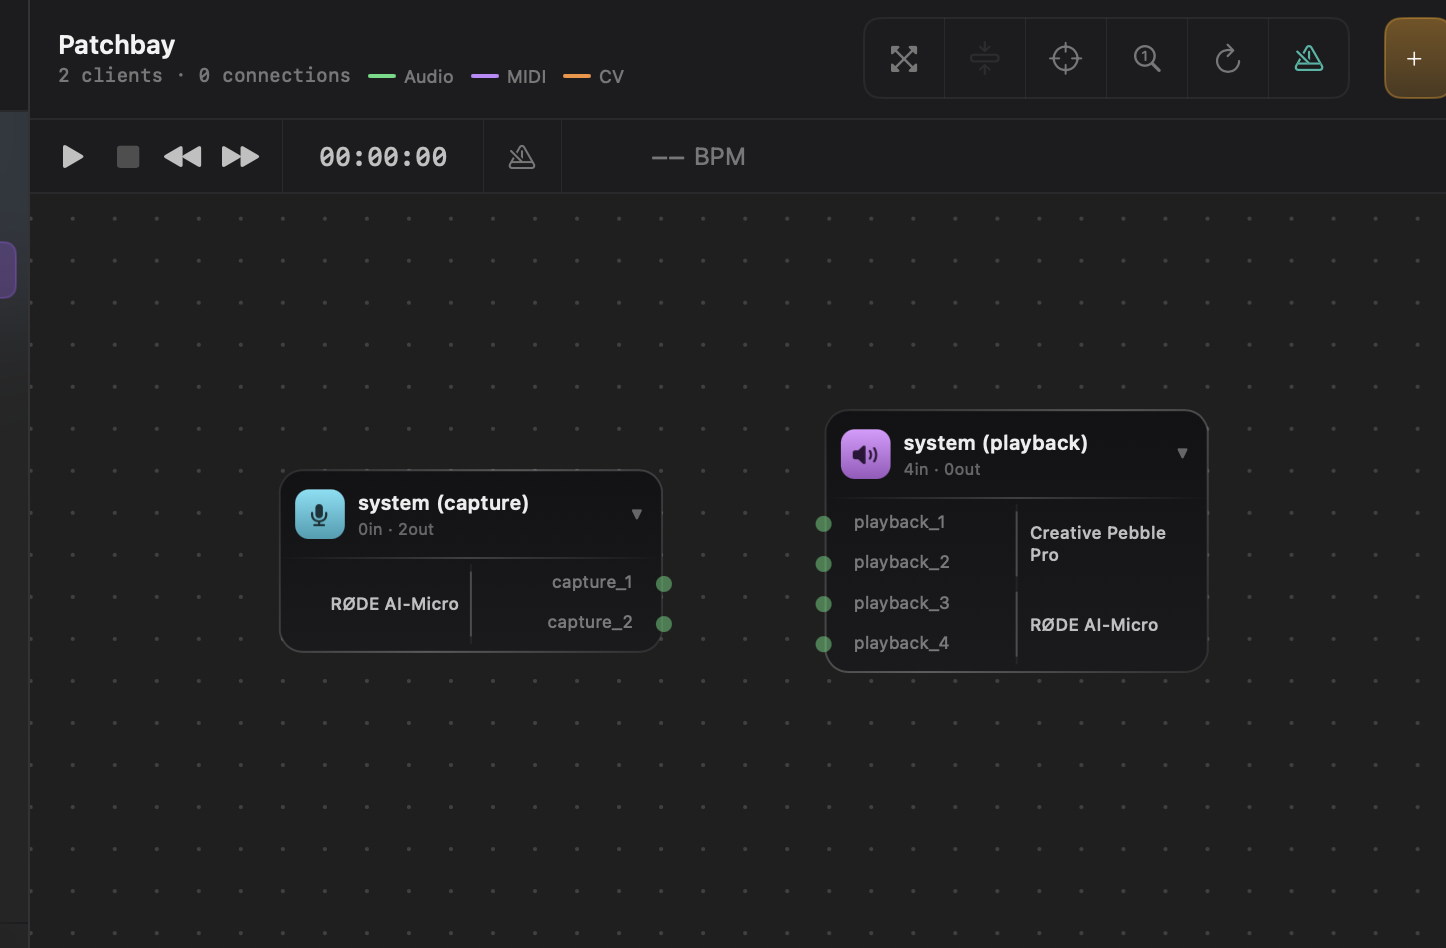
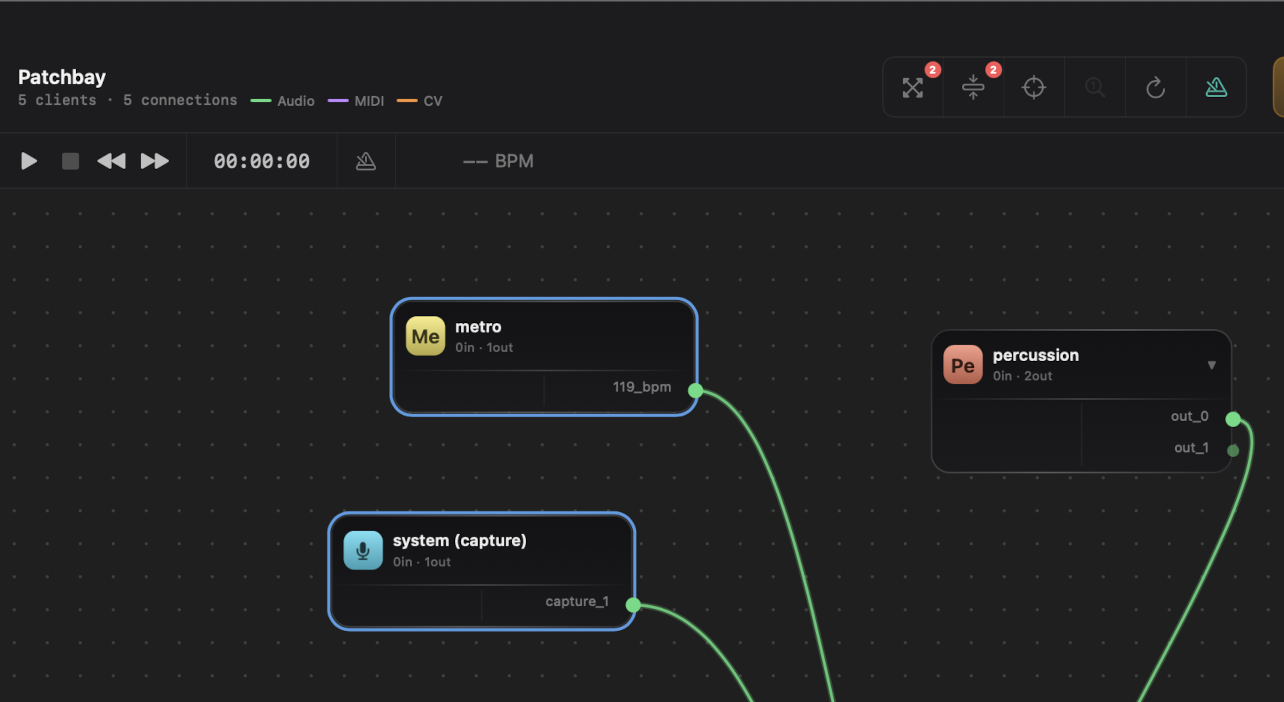
The two system clients system (capture) and system (playback) represent the physical audio interface. Unlike regular client nodes, they display additional hardware information (new in v1.9.0):
- Device name: the CoreAudio device name is shown in the free zone above the port list
- Aggregate bar: when Jack has created an internal aggregate (two separate devices used as input and output), each physical device segment is indicated by a vertical bracket bar, with its name and channel count
Clicking the badge opens a detail sheet with the full hardware breakdown.
Connections
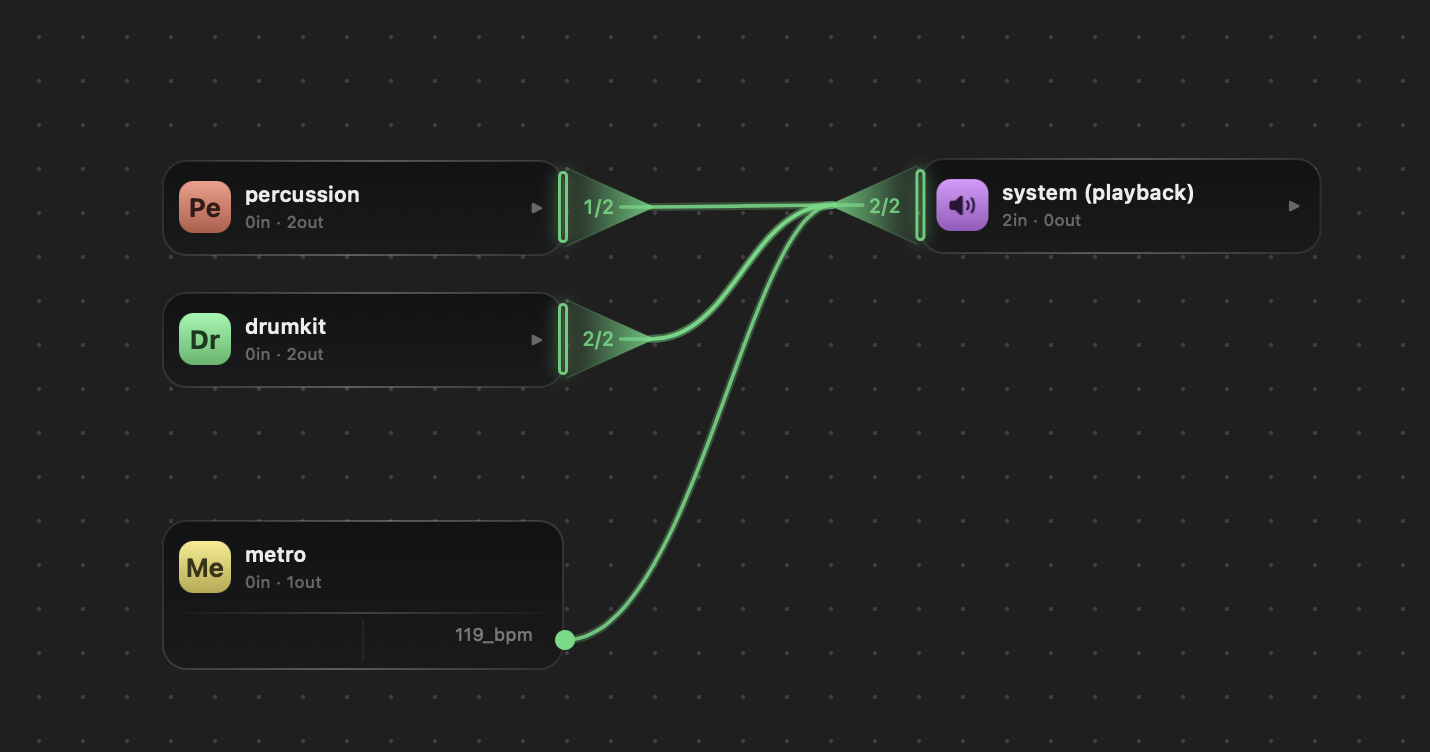
A connection links an output port to an input port. Audio signal flows left to right. A Jack connection is not exclusive — a port can be connected to multiple destinations.
Canvas navigation
Panning
Click and drag on the canvas background to move the view.
When moving nodes or panning near the canvas edges, a subtle haptic feedback is triggered on the trackpad — indicating you’ve reached the boundary.
Zoom
- Pinch on trackpad — smooth zoom centred on the cursor
- Vertical scroll with the mouse wheel — discrete zoom
- A zoom indicator appears temporarily as an overlay while zooming
Re-centring
Click the ⊕ Re-centre button in the header to fit and centre all visible nodes. Click on the magnifier 1:1 to reset zoom to 100% (only active when already zoomed-in or zoomed-out).
Nodes
Each Jack client is represented as a box (node) on the canvas.
Badge
The top-left corner of each node shows a badge with the client’s initials (two letters, colour generated deterministically).
For system clients: - 🎙 system (capture) — microphone icon, cyan colour - 🔊 system (playback) — speaker icon, violet colour
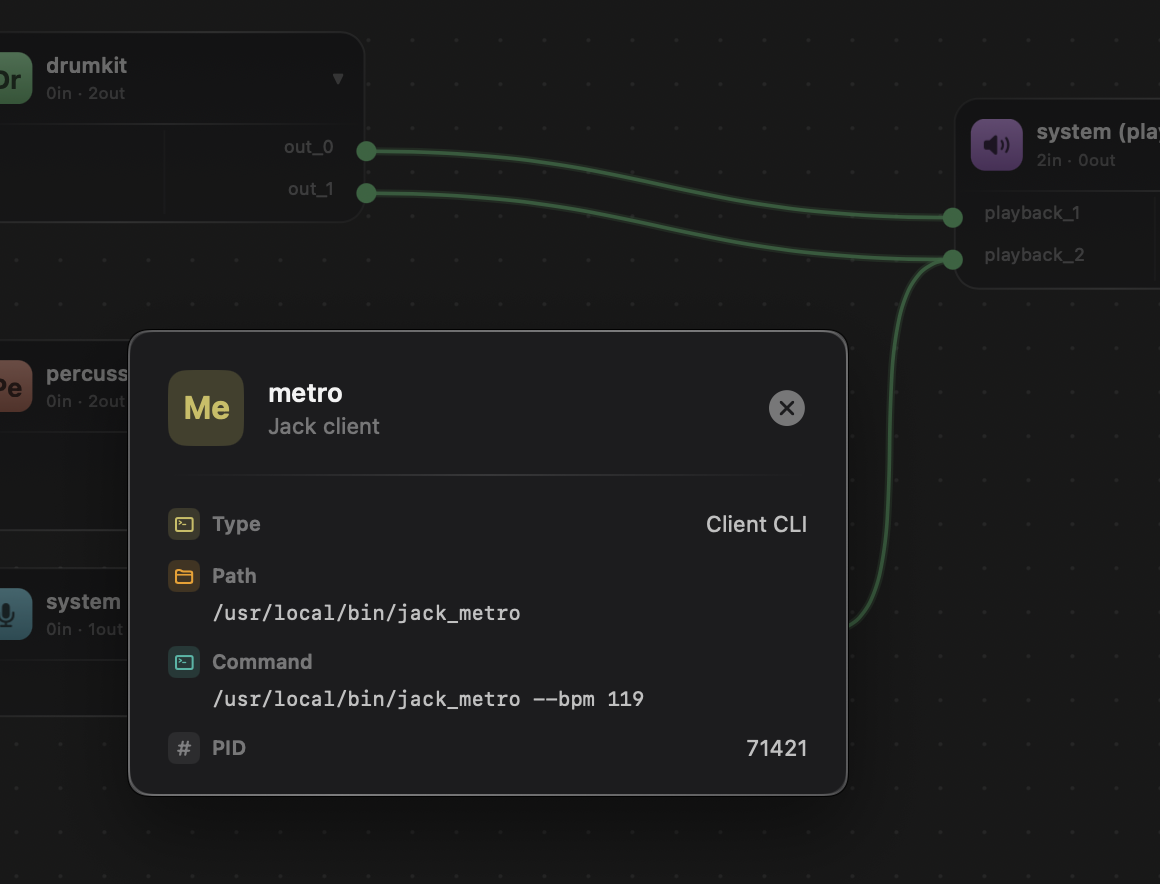
Click the badge to open a detailed info sheet for that client.
The sheet displays: - GUI applications: name, bundle path, PID, icon - CLI clients (jack_metro, a2jmidid, etc.): executable path, full command line, PID — detected by scanning the process table
Collapse / expand
Click the arrow next to the node name to collapse it. A collapsed node hides its ports but remains on the canvas. The toolbar buttons Collapse all / Expand all act on every node at once.
Moving a node
Click and drag the box to reposition it freely.
Multiple selection
Select several nodes simultaneously:
| Action | Result |
|---|---|
| Shift + click on a node | Add/remove from selection |
| ⌘A | Select all nodes |
| Click + drag on empty canvas | Marquee selection rectangle |
A count badge appears on the collapse/expand button when a selection is active. Click the badge or outside any node to deselect.
Group drag
With multiple nodes selected, drag any one of them — all selected nodes move together, preserving their relative positions.
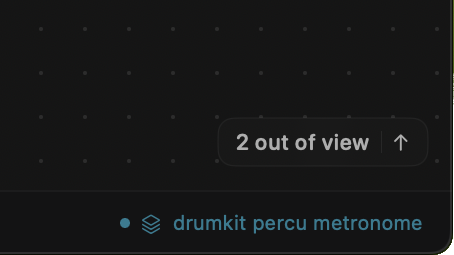
Out-of-view nodes
When nodes are outside the visible canvas area, directional indicators appear on the window edges. Click an indicator to centre the view on the corresponding node.
Connections
Creating a connection
Click an output port (dot on the left of a node) then an input port (dot on the right of another node). The connection is established instantly in Jack.
Removing a connection
Click an existing wire to remove it.
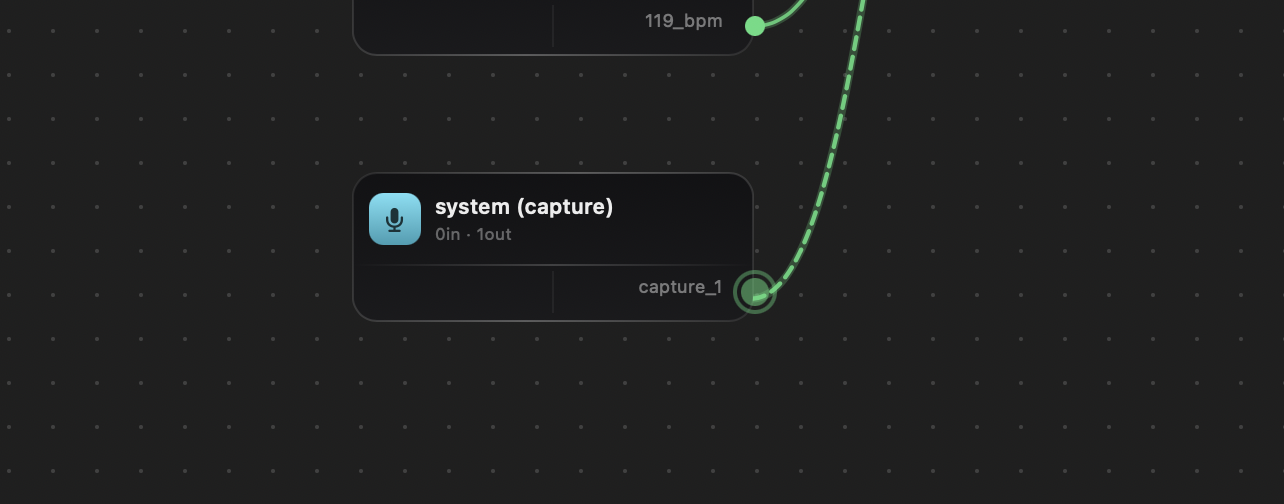
Port hover
Hovering over a port animates a circle around it. Connections linked to that port are highlighted. A light haptic feedback fires on the trackpad when the cursor snaps onto a port.
Connect All
Connect All establishes connections in bulk between two clients — useful for quickly linking a DAW to system (playback) or wiring an effect chain.
- Click the Connect All button in the toolbar (or right-click a node → Connect All)
- A sheet opens with a canvas preview of both clients
- Select the source client and the destination client
- Choose the connection mode: modulo (cycles channels if counts differ) or 1-to-1
- Click Connect — all matching ports are wired at once

Toolbar
| Button | Action |
|---|---|
| Tidy | Automatically reorganises nodes on the canvas (Sugiyama layout) |
| Collapse/expand | Collapse or expand clients (either all or selected nodes) |
| ⊕ Re-centre | Fit and centre all nodes; double-click to reset zoom to 100% |
| ↻ Refresh | Force-resync ports and connections from Jack |
| Transport | Open the transport panel |
| Save as Studio | Save the current state as a named studio |
| Open Audio Midi Setup | Quick access to macOS configuration panel |
| Logs | Open/close the Jack log panel (filtered outputs) |
Tidy layout
The Tidy button automatically arranges nodes using a hierarchical layout algorithm (Sugiyama). It minimises wire crossings and groups clients by signal flow (sources left, sinks right).
You can also Tidy a selection only: Shift-click nodes to select them, then click Tidy — only the selected nodes are rearranged.
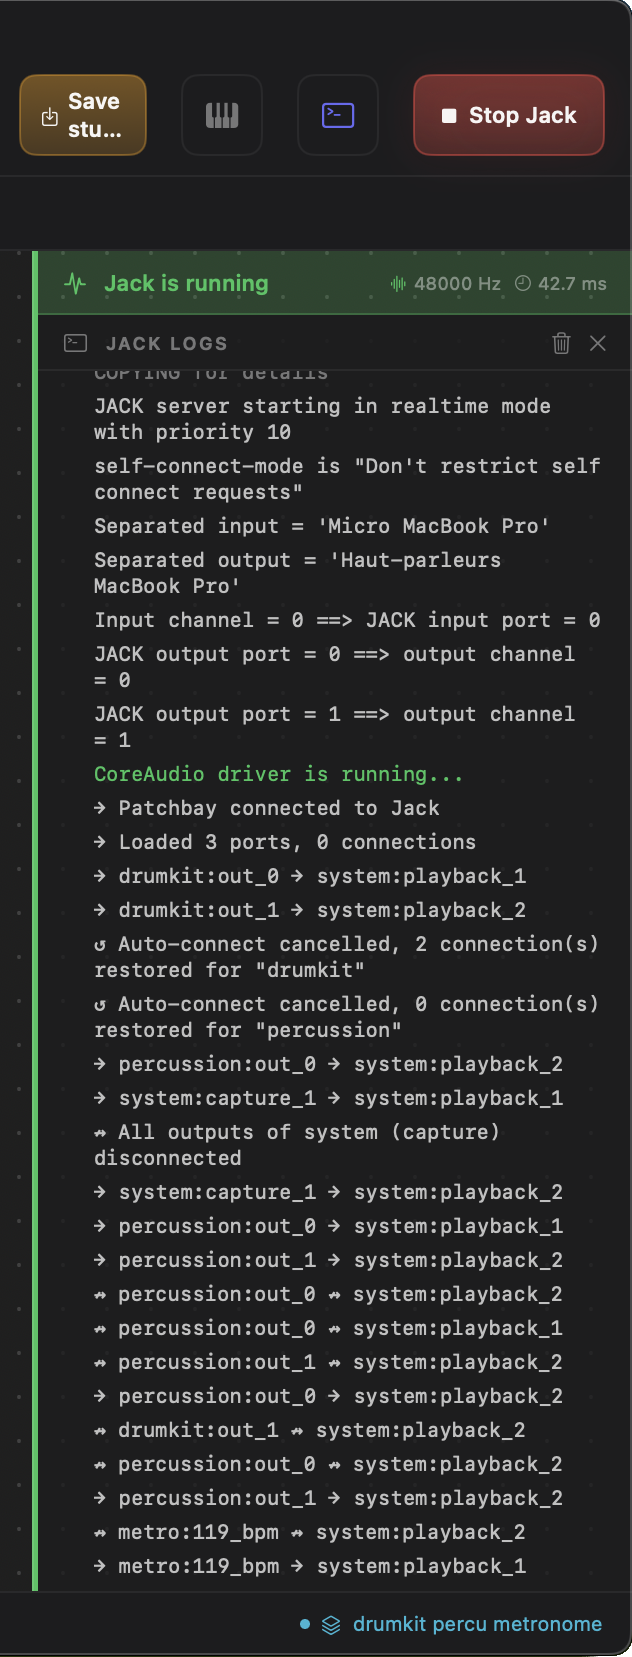
Log panel
The log panel appears on the right side of the canvas. It shows the raw output of the Jack process in real time.
An orange badge on the Terminal button signals warnings in the logs.
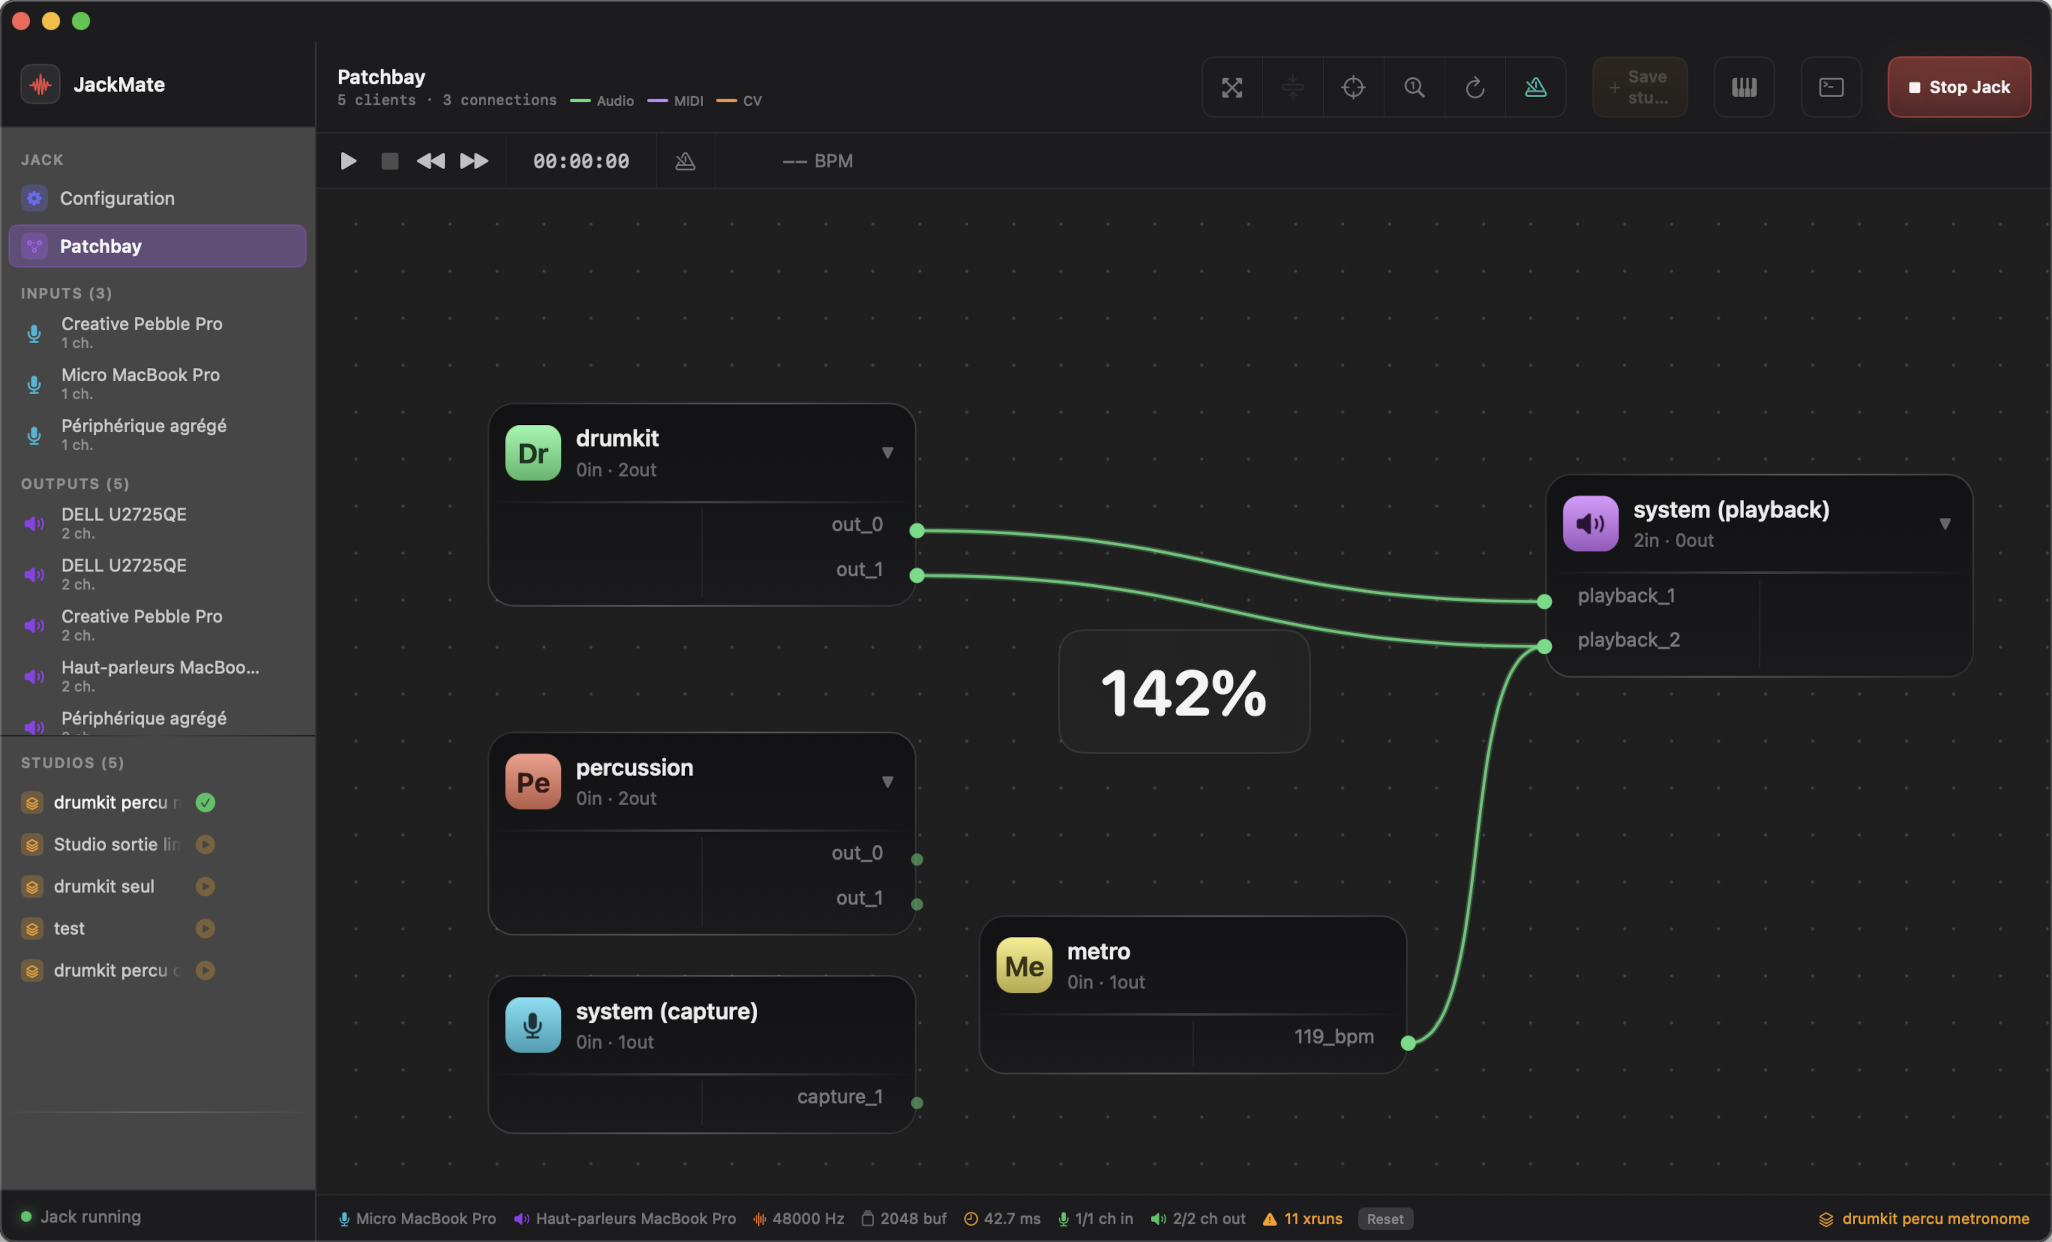
Xruns (audio dropouts) are counted and displayed in the footer. A Reset button clears the counter.
Footer
The bar at the bottom of the interface permanently shows:
- Active input interface
- Active output interface
- Sample rate, buffer size, theoretical latency
- Xrun counter (if > 0)
- Loaded studio (with a modification indicator if the patchbay has diverged from the saved state)
Two additional chips appear in context:
| Chip | When shown |
|---|---|
| Aggregated by Jack | Jack has created an internal aggregate from two separate devices |
| Jack started externally | Jack is running but was not started by JackMate — device names are unavailable via the Jack API and are replaced by this indicator |
